Anna dress patterns!
December 9, 2013
as i hunker down and prepare for exams (and also hours of embroidery to put the finishing touches on my anna costume), i cant help but think about the sewing that awaits me over the break!
my friend who was planning on being elsa is unhappy with the way her dress came out (we DID throw a lot together last minute, but i think her work was awesome!) so she has agreed to be my sister-in-costume if i re-make the dress for her!
as i started to assemble some possible reference patterns, i realised tht i havent posted ANYTHING about the patterns i used to make my anna costume!!
MASSIVE JUNK BELOW ThE CUT
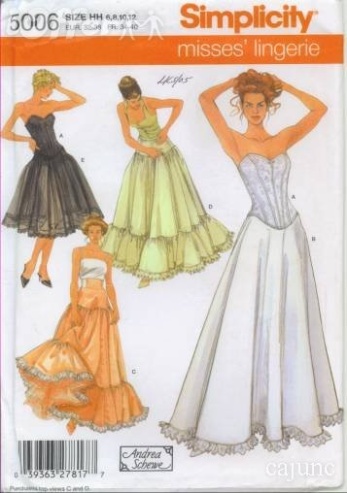
really, i only used one pattern: simplicity 5006
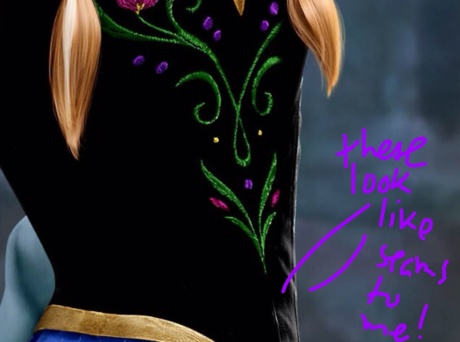
i chose to use this pattern over any others because A) i already owned it, and any chance to save money is lovely! B) its relatively simple, so i was comfortable modifying it! and C) the pieces seemed to match what annas bodice (seam wise)
it definitely took a good amount of modification, but im happy with how it came out!!
i did NOT use boning like the pattern calls for, but i used a lining with interfacing. It took me a wee bit longer because i wanted to make sure everything matched up right and it was a bit annoying while i was embroidering, but im glad i added the extra layer for extra strength!
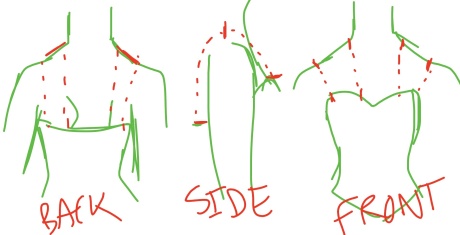
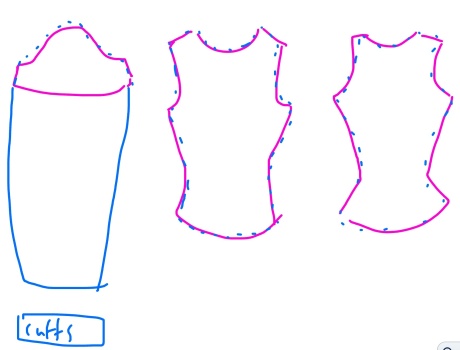
attaching the sleeves to the bodice was pretty easy, as was drafting the pattern for them.
i just measured from the top of my shoulder to the top of my bodice in the front and the back, added on a few inches for seam allowance, then sewed them on! as far as the width goes, i mainly just looked at pictures for reference. it was based mostly off of what i thought looked the most accurate on me (i think i had 3″ wide at the bottom, 4″ along the shoulder), so this step is pretty personal
the other part of the pattern i used was the skirt! just like the bodice, it require a good amount of modification, but it was a start!
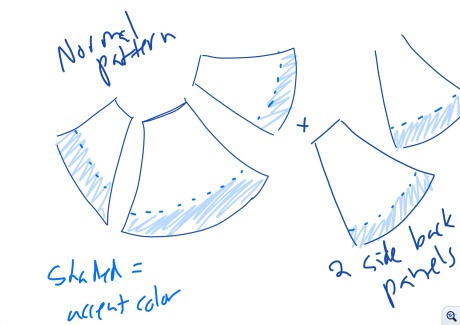
i just used the basic pattern bits (front, side backs), but had to add two extra panels (i just cut two more of the side backs) to make room for the pleats!
i also neglected using the waistband and just cut a strip of fabric that was the appropriate length (mainly because i lost one of the waistband pieces and i am incredibly lazy)
i cut the pieces a little short since the skirt was so long on me!
i also used this pattern to cut out the pieces of the accent color. i just did a strip of fabric about 6″ wide that matched up with the bottom of the skirt.
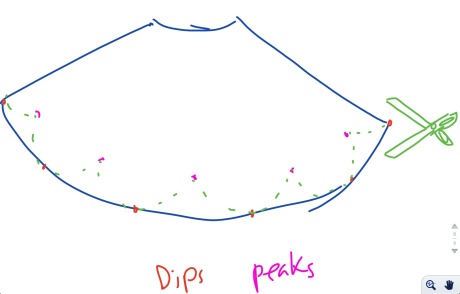
in hindsight, there was probably a way better way to do the scalloping at the bottom, but i laid out the skirt, measured it from end to end, then divided up the length by how many dips i wanted ( i went with 5 on each side; i know 12 probably would have been more accurate but i am not sure i would have made it through 20% more embroidery!! eek!)
i marked the dips then divided them in half again, just so i knew where to cut up, as well!
i measured each dip and peak at about 5″, but this is another step thats open to interpretation!
and speaking of steps that depend on personal reference, THE PLEATS!
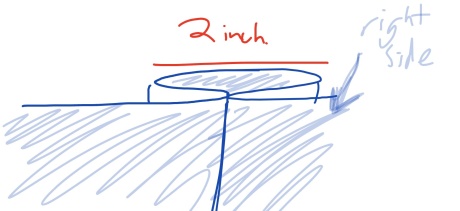
for me, they used up the extra fabric from the added-in panels PERFECTLY! but this was just a stroke of luck; i didnt really think it out ahead of time (hmmm you may be noticing a pattern here), so i guess i would recommend figuring out how much extra fabric you have and basing your pleat size off of that!
the way i folded mine ate about 4 inches of fabric per pleat!
the position of the pleat in the skirt also depends–i had to move mine around a few times because they were too close to the front or side.
for the shirt, i just dissected an old, fitted t-shirt of my sister’s! i used this pattern as a base for my blouse! since i was totally making up the sleeves, they took a little bit of fitting, but other than that it worked great!
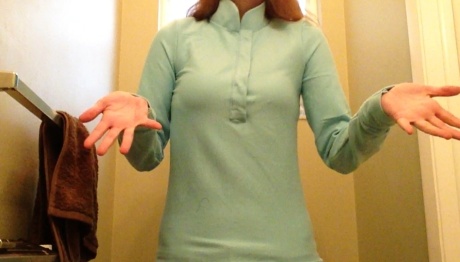
things got a little tricky when it came to the button-up up the middle: i was really in no mood to sew in like 10 buttons, so i just did as many as i knew would be visible above the bodice
skipping over that part for now just because it is sooo unnecessarily complicated!
i imagine it would be much easier to just construct it like a normal button up, except with a strip of cloth over the buttons to co ver ’em up!
ii used the collar from my friend’s pattern (it featured a mandarin collar), which was a bit of a hassle but it wasnt too bad! i did an interfaced lining on the mandarin collar, as well, so it would stand up super well!
iive still got work to do (mainly on the collar part of the blouse),, but this is how i did what ive finished so far! the rest was just EMBROIDERY UGH
ANNA DARLING I LOVE YOU AND YOUR CLOTheS
BUT WHY DOES IT ALL nEED to BE EMBROIDERED
iidk if this served any purpose other than justifying my putting off my homework

Thank you so much for posting such detailed notes on your entire costuming process! I’m borrowing a lot of your notes to make my own Anna costume, especially since the finished product of yours looks so amazing. Thanks for being awesome!
aaaahhhh dude no way, thank YOU for being awesome!! ^^ im glad i could help!
Wow! I love that you are as obsessed as me with her clothing, I want to make EVERYTHING! I did not use embroidery though, I used needle felting. This would work best on wool, but due to budget (and the fact I made it for a 3 year old), I used fleece as the main material. It works well. I’m desperate to try Anna’s coronation dress now. Thanks for all your wonderful annotations:-)
that sounds AWESOME!! 😮 haha yessss making everything! go team HARDCORE!
omg im just honored they were intelligible and that you liked them! thank YOU!
Hi, I was wondering what you did with the back of the bodice. I am trying to recreate the bodice based of of yours (my last attempt was a bit of a fail) and the pattern calls for a lace up back which just doesn’t seem to fit with the rest of the costumes . . . It would mean so much if you could respond 🙂
aahhh SORRY I HAVE BEEN SO BUSY
anyway what i did was just ignore the whole lace up thing and sew in a zipper :p hardly time-period-appropriate but WAY easier!!
and i totally agree with you, it wouldnt look quite right! :O
HOW MANY YARDS DID YOU NEED FOR THE SKIRT? AND BTW I LOVE YOU OMG YOU DONT EVEN KNOW YOU ARE A LIFE SAVER AND I LOVE YOUR AMAZING WORK!!
Omg you are actually too sweet!! :,D
Hmmm if I remember correctly I think I got 5 yards? The skirt pattern calls for ~3.5, but I needed extra for the extra panels! I should probably also include that I never really had enough fabric to fit all the pieces on the fabric, but I wanted the skirt to be shorter than the designated length so it was never a problem for me! ^^
also it depends on the size youre going for!